If you could smell our kitchen right now . . .

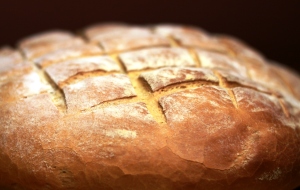
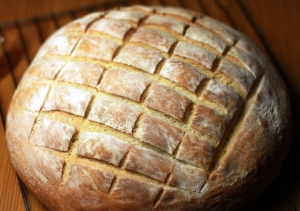
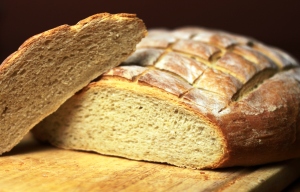
What is it about flour, yeast and water when cooked in an oven that smells so amazing and homely? Our kitchen, and for that matter, rest of our home is filled with the most seductive baking smell known to man, fresh-baked bread !

In our attempt to learn new skills and techniques in baking we choose to bake our own white rustic loaf of bread to use for sandwiches during the week. Having recently purchased the “Great British Bake Off” book we noticed that one of the challenges that the contestants faced was baking a Focaccia recipe by master baked Paul Hollywood. Also contained, was a recipe for a basic white loaf though not quite in the right quantity that we wanted. Not a problem, a quick google search and there was Mr Hollywood’s bread with the volume we needed.

Even if you don’t eat bread we urge you to give this a go even if it’s to experience the aroma our household has at this very moment.
Ingredients:

500g Strong White Bread Flour – 2 x 7g packets Dried Yeast – 40g Soft Butter – 2 tsp Salt – 300ml Tepid Water – 1 tbsp oil

Method:

Put the flour into a large mixing bowl and add the butter. Add the yeast at one side of the bowl and add the salt at the other, otherwise the salt will kill the yeast. Stir all the ingredients with a spoon to combine. Add half of the water and turn the mixture round with your fingers. Continue to add water a little at a time, combining well, until you’ve picked up all of the flour from the sides of the bowl. You may not need to add all of the water, or you may need to add a little more – you want a dough that is well combined and soft, but not sticky or soggy. Mix with your fingers to make sure all of the ingredients are combined and use the mixture to clean the inside of the bowl. Keep going until the mixture forms a rough dough. Use about a teaspoon of oil to lightly grease a clean work surface (using oil instead of flour will keep the texture of the dough consistent).

Fold the far edge of the dough into the middle of the dough, then turn the dough by 45 degrees and repeat. Do this several times until the dough is very lightly coated all over in olive oil. Now use your hands to knead the dough: push the dough out in one direction with the heel of your hand, then fold it back on itself. Turn the dough by 90 degrees and repeat. Kneading in this way stretches the gluten and makes the dough elastic. Do this for about 4 or 5 minutes until the dough is smooth and stretchy. Work quickly so that the mixture doesn’t stick to your hands – if it does get too sticky you can add a little flour to your hands.

Lightly oil your mixing bowl and put the dough back into it. Cover with a damp tea towel and set it aside to prove. This gives the yeast time to work: the dough should double in size. This should take around one hour, but will vary depending on the temperature of your room (don’t put the bowl in a hot place or the yeast will work too quickly). Line a baking tray with baking or silicone paper (not greaseproof).

Once the dough has doubled in size scrape it out of the bowl to shape it. The texture should be bouncy and shiny. Turn it out onto a lightly floured surface and knock it back by kneading it firmly to ‘knock’ out the air. Use your hand to roll the dough up, then turn by 45 degrees and roll it up again. Repeat several times. Gently turn and smooth the dough into a round loaf shape. Place the loaf onto the lined baking tray, cover with a tea towel and leave to prove until it’s doubled in size. This will take about an hour, but may be quicker or slower depending on how warm your kitchen is.

Preheat the oven to 220C (200C fan assisted)/425F/Gas 7. Put an old, empty roasting tin into the bottom of the oven. After an hour the loaf should have proved (risen again). Sprinkle some flour on top and very gently rub it in. Use a large, sharp knife to make shallow cuts (about 1cm/½in deep) across the top of the loaf to create a diamond pattern. Put the loaf (on its baking tray) into the middle of the oven. Pour cold water into the empty roasting tray at the bottom of the oven just before you shut the door – this creates steam which helps the loaf develop a crisp and shiny crust. Bake the loaf for about 30 minutes.

The loaf is cooked when it’s risen and golden. To check, take it out of the oven and tap it gently underneath – it should sound hollow. Turn onto a wire rack to cool. If your anything like us though, you won’t be able to wait that long and will enjoy a slice with a topping of quickly melting butter.

Happy baking !

We Rocked the Casbah

Been a cold old day here in the UK and the early signs of a cold winter are starting to appear. That means only one thing, Comfort food !

It just so happens that we have recently purchased a lovely royal blue tagine so what a perfect opportunity to give it a test. What kind of tagine to make was the next dilemma. So, at this point it is only fair that I thank Mr Jamie “Pukka” Oliver for a fantastic recipe for “Beef Chickpea & Butternut Squash Tagine”, though we did amend it slightly to make it our own.

Please note that you can use any kind of pot for this though I’m sure you’ll agree it looks pretty cool served in an authentic tagine. . .

Ingredients:

800g Beef Braising Steak – 400g Cooked Chickpeas – 1 Large Butternut Squash – 400g Tinned Plum Tomatoes – 1 Large Onion – 600ml Beef Stock – 1 tbsp Ras El Hanout – 1 tbsp Cinnamon – 1 tbsp Ground Ginger – 1 tbsp Cumin – 1 tbsp Paprika – 4 Cloves Sliced Garlic – Fresh Coriander – Salt & Pepper

Method:

Mix the ras el hanout, cinnamon, paprika, cumin & ginger in a bowl and add the beef and massage the spice mix into the meat. Set aside to allow the flavour of the spices to penetrate into the beef. ( Ideally overnight ) Heat some olive oil in the tagine and fry the beef for around 5 minutes until browned on the outside. Meanwhile slice the onion and add to the browned beef along with the tin of tomatoes, chickpeas, sliced garlic and half of the beef stock. Season generously with salt & pepper.

Place the tagine into the oven at 170c / 325f / Gas 3 and allow to cook for approximately 1.5 – 2  hours. At this point give the tagine a stir and add the butternut squash and remaining stock. Place back in the oven and cook for a further 1 – 1.5 hours. The beef should now be incredibly tender and break apart with a spoon. Sprinkle with fresh coriander, serve the beef tagine with cous cous and warm flatbread. . .

Note: Ras el hanout (Arabic for “top of the shop”) is a blend of the best spices a vendor has in his shop. The mixture varies depending on who is selling it, but can be a combination of anywhere from 10 to 100 spices. It usually includes nutmeg, cinnamon, mace, aniseed, turmeric, cayenne, peppercorns, dried galangal, ginger, cloves, cardamom, chilli, allspice and orris root.

Bursting with Berry Goodness

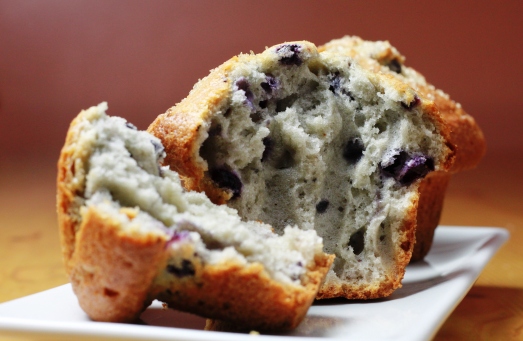
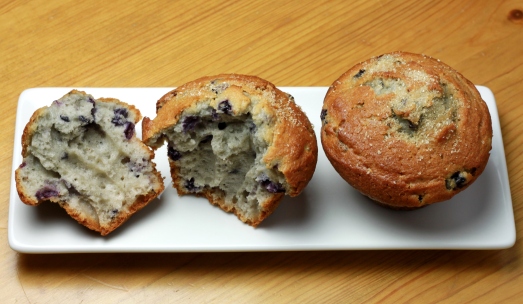
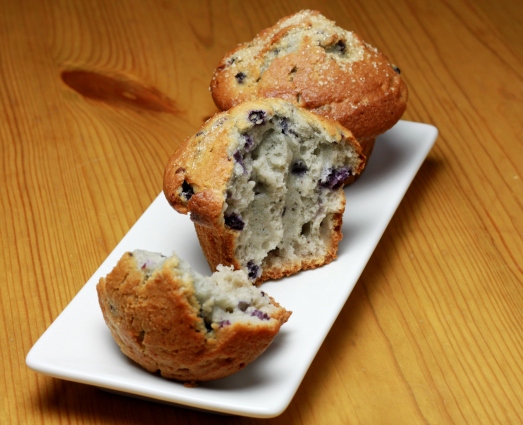
Question –  What goes so well with your midday cup of coffee ? Well you could opt for a nice bagel or sandwich however what do you do if the perfect partner to your coffee is something tantalisingly sweet?

Answer – A  perfectly baked moist Blueberry Muffin bursting with berry goodness

Ingredients:

400g Plain Flour – 170g Caster Sugar – 170 ml Full Fat Milk – 115 ml Vegetable Oil – 2.5 tsp Baking Powder – 2 Eggs – 1 tsp Vanilla Extract – 220g Blueberries – Orange / Lemon zest ( optional ) – Demerara Sugar

Method:

Pre-Heat your oven to 190c / 375f / Gas 5. Sieve the flour into a large mixing bowl add the caster sugar and baking powder combining well. Whisk together the eggs, oil, milk, vanilla extract and zest if using. Pour the liquid mixture into the flour and gently fold together. Only fold until there is no flour showing ( a few lumps are fine just no streaks and mixing too much will result in dry tough muffins )

Add the blueberries ( fresh or frozen ) and divide mixture into a pre greased muffin tray if not using paper cases ( This recipe will be enough for approximately 12 muffins depending on how deep your muffin trays are ) Bake the muffins in the oven for between 20 – 25 minutes or until just firm to the touch and well risen. Trust us you will know when they are ready as the aroma will be calling you to the oven. Sprinkle the muffins with Demerara sugar and allow them to cool in the tray for a few minutes before placing onto a wire cooling rack. They can be eaten warm if you can’t wait long enough for them to cool completely !

So what do you think, will you have the patience to wait for them to cool ?

Ultimate Yorkshire Puddings

Nothing goes better with Sunday roast beef dinner that a light well risen traditional Yorkshire Pudding. At their best they are fluffy and airy on the inside while having a satisfying crisp outside. Now while they are the perfect accompaniment to a roast beef dinner the batter mix is identical for Toad in the hole ( Sausages baked in the batter – No toads ! ) Some even eat them with jam as a dessert. . .

The important factor with this recipe is that it is made by volume not by weight, meaning that what ever measuring cup you use it must be the same for both the wet and the dry ingredients. ( Adapted from an original recipe by Yorkshire chef Brian Turner )

Ingredients:

1 cup Plain Flour – 1 cup Eggs – 1 cup water/milk  ( 50-50 split ) – Pinch of Salt – 1 tbsp Malt Vinegar

Method:

Sift the flour into a large mixing bowl and add a pinch salt. Add the eggs to the flour and half of the water / milk mixture. Beat well until all lumps of flour have gone. Add the remaining water / milk and the vinegar. Give the mixture a final beat with a whisk and set aside to rest for a while.

Pre-Heat your oven to 400 f / 200 c / Gas 6 and add a muffin tray with each section containing either beef dripping ( traditional fat used ) or a vegetable oil to about one fifth of section. Allow oil to get really hot in the oven. Once the oil is heated work quickly and fill each section of the muffin tray with the batter. ( It should sizzle as soon as it comes into contact with the hot oil ) Place the tray quickly back in the oven on a middle shelf and bake for 25 minutes. DO NOT open the oven door during this time or your Yorkshire puddings will collapse !

After 25 minutes the tray can be turned in the oven to allow for even cooking and continue to cook for a further 10 minutes or until a they puddings are a deep golden brown.

Remove from the muffin tray and serve immediately. If you make too many don’t worry as they make a fantastic alternative to bread for a rare roast beef & horseradish sandwich. Sounds odd I know but watch the video below from chef Andy Bates to see what we mean. . .

Perfect with an Ice-Cold Beer . . .

There are an absolute plethora of assorted nuts and snacks available these days from any high street shop combining all kinds of flavours. Some of them are very tasty indeed, personal favourite at the moment is the Honey & Jalapeno peanuts available from the Lakeland cookware store.

That said they all have one major flaw ! There cold and nothing goes better with an ice-cold beer or glass of scotch than a bowl full of flavoursome homemade hot nuts to nibble on. Just the thing while watching a movie or reading your favourite book.

I can’t recall where I first saw the original recipe but it was based upon the famous Union Square Cafe in New York who serve these warm at the bar. As always I’ve made the recipe my own with a few variations on the ingredients. These really are so simple and a cut above anything you can purchase in a packet.

Ingredients:

300g Assorted Unsalted Nuts – ( we used Almonds, Peanuts, Brazil’s, Walnuts, Hazelnuts ) – 1 tbsp Melted Butter – 1 tbsp Dark Brown Soft Sugar – 2 tbsp Chopped Fresh Rosemary – 1 tsp Cayenne Pepper – 1 tsp Sea Salt – 1 Pinch Chilli Flakes

Method:

Pre-heat your oven to 350 f  / 180 c / Gas 4 and place your nuts onto a baking tray, spread out evenly.

Heat the nuts in the oven for around 10 minutes until slightly browned ( Give the tray a shake every now and then and don’t allow them to burn ) Meanwhile combine the butter, sugar, chopped rosemary, cayenne pepper, chilli flakes and half the salt into a large mixing bowl. Once the nuts are cooked add them to the bowl and thoroughly coat the nuts in the butter mixture. Place the nuts into a serving bowl while still hot / warm and sprinkle on the remaining sea salt. Pop the cap off an ice-cold beer and enjoy !

Note: For those of you that don’t like spicy heat you can omit the chilli flakes and half the amount of cayenne pepper.

Don’t Cry ! It’s Only Soup

Well maybe you’ll cry just a tiny bit just like me when you slice loads of nice big strong onions to make this delicious French Onion Soup. . .

This really is a satisfyingly warming autumnal soup that’ll fill you up and keep you toasty and warm inside. Mrs A Hint of Garlic has come down with a cold due to the change in weather recently so what better way to cheer her up and make her feel better than this classic bubbling hot soup.

Ingredients:

4/5 Large Onions – 1 tbsp Dried Thyme – 1 Knob Butter – 3 tbsp Olive Oil – 2 Cloves Garlic – 1.5 / 2 Ltrs Beef Stock – 1 tsp Marmite – 2 tbsp Cognac (optional but very tasty) – French Baguette – Gruyère Cheese

Method:

Slice your onions and over a very low heat start to soften in the butter and olive oil. The trick to this soup is to be patient and take a good 20 – 30 minutes slowly cooking the onions to allow the natural sweetness and sugars to release from the onions. Once very soft and translucent turn up the heat and while stirring add the crushed garlic and thyme. Continue to stir over a medium heat until the onions are caramelised and sticky.

Once the onions are nicely caramelised add a good quality beef stock ( add the cognac if your using it ) Marmite, season well with salt and pepper and allow to simmer gently for 30 – 40 minutes without a lid or until the liquid has reduced by half. Meanwhile slice a baguette on the bias and lightly toast on both sides. Grate the Gruyère cheese and pile onto the toasted baguette.

Pre-heat a grill onto its hottest setting and ladle the soup into serving bowls before placing the cheesy toasted baguette on top of the soup. Place under the grill until the cheese is melted and bubbling.

Serve immediately while still bubbling away, oh and don’t forget to warn your family and friends its very very hot !


The good news is Mrs A Hint of Garlic is feeling much better for eating this ( though not quite up to the dishes yet apparently 🙂 ) For me the best part of this soup is eating the cheesy soggy toast at the end . . .

Coming Soon from A Hint of Garlic 

  Ultimate Yorkshire Puddings &  Cheese & Chilli Scones

Thai Inspired Shredded Chicken & Noodle Salad

While the last few days of the summer are still with us why not enjoy a lovely healthy shredded chicken Thai style salad. In our household we always have a strong debate over the amount of chilli peppers that go into most dishes whereas here its easy because the chillies can be served on the side and added as required by the individual.

Ingredients:

Rice Noodles – Cooked Chicken Breast – Spring Onions – Granny Smith Apple – Cherry Tomatoes – Fresh Mint Leaves – Red Onion – Fresh Chilli Peppers – Roasted Peanuts – Crispy Fried Shallots – Fish Sauce – Dried Chilli Flakes – Limes – Sugar – Garlic Clove – Rice Vinegar

Method:

First of all make your salad dressing by combining the juice of two limes with a tablespoon of fish sauce a pinch of both dried chilli flakes and sugar. Add a crushed garlic clove and a splash of rice vinegar. Mix together and adjust to taste before setting aside. Next prepare your noodles following the instructions on the packet ( with rice noodles we normally leave them to soak in hot water for about 10 minutes then refresh in cold water ) Shred your cooked chicken breasts by hand which has a better appearance than slicing with a knife for this salad, add to the cold noodles. Slice your apple and spring onions (scallions) into matchsticks before adding to the salad. Half or quarter your cherry tomatoes and very finely slice a small red onion before finely ripping up a handful of fresh mint leaves. Toss the noodle salad with the previously made dressing and serve with the crispy fried shallots, chopped roasted peanuts, sliced fresh chillies and lime wedges on the side.

The Earl of Sandwich would be proud !

There are times when you don’t feel like cooking a meal yet need something more filling than any ordinary snack. So what do you do ?

Well tonight we decided to make a nice thick cut hot sandwich. . .  Therein lay the next dilemma ! What kind of filling ? 

Beef & Horseradish ? Nah, we haven’t got any beef which could be problematic in its assembly 🙂  Wait what about Chicken & Stuffing ? ooops this time neither the chicken or the stuffing available. . .

Ah ha ! Brie Lettuce & Bacon

Now this is a sandwich that hits the spot ! Creamy ripe brie combined with fresh green lettuce and smokey crispy bacon sandwiched between delightfully soft fresh-baked bread.  Bet your feeling hungry for a sandwich now . . .

Well my fellow bloggers, whats your favourite sandwich ?

Ultimate Victoria Sponge

Do you have family or friends coming to visit?    

We did this Sunday and what better way to show we were pleased to see them than to bake a fabulous fresh cream cake for them to enjoy!

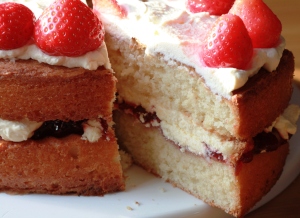
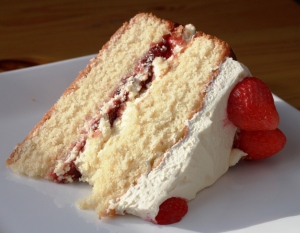
We have titled this post our “Ultimate Victoria Sponge” though you have to bear in mind that this is our version of the classic which would normally have used raspberries and not strawberries and would have been finished with a dusting of icing sugar and no cream. Why call it a Victoria Sponge then? I hear you ask, well the sponge mixture is as traditional as it gets.

Oh one other thing to mention, most recipes you will find seem to use 20cm sandwich tins however our recipe is calculated for 24cm tins. We have just purchased a set of 24cm silicone sandwich tins and wanted to test them out which proved to be a very good purchase indeed.


Ingredients:

286g Unsalted Butter (room temperature) – 286g Caster Sugar – 5 Free Range Eggs – 1 tsp Vanilla Extract – 286g Self-Raising Flour (sifted) – 1 tbsp Milk (room temperature) – 400 ml Double Cream – Strawberry Jam – Fresh Strawberries

Method:

First of all its worth us pointing out that we used our trusty KitchenAid stand mixer though this could easily be made using an electric mixer or if you feeling in need of a workout even by hand ( good luck with the hand whisking method 🙂 )

Preheat your oven to 180c / 350f / gas 4 and then add your Butter to the mixer and beat until very smooth and creamy. With the mixer still on gradually add the sugar and once all of it has been added continue to beat the mixture for a further 4-5 minutes. This will turn the mixture very light and fluffy which is one of the secrets to a light airy sponge. ( Dont forget to scrape down the sides of your mixing bowl every now and then to ensure everything gets mixed in ) Break your eggs into a small bowl and add the vanilla extract before beating lightly with a fork. Now very gradually add the egg mixture to the butter and sugar allowing each bit to fully incorporate before adding the next. ( if you think the mixture is going to curdle add a tablespoon of the sifted flour ) Sift your flour for a second time into the butter mixture, add the milk and gently fold the flour into the butter mixture with a metal spoon until fully incorporated and no streaks of flour remain visible. ( Do this as lightly as possible to avoid knocking out the air you have just beaten into the mixture ) Devide the sponge mixture between two 24cm sandwich tins and spread the mixture evenly to the edges. Bake for approximately 20 – 25 minutes until golden brown and the edges are pulling away from the sides of the tins.

Once the sponge have cooled slightly turn out onto a wire rack to fully cool down. Once cooled completely turn one sponge upside down onto a serving plate or cake stand and spread a generous amount of your favourite strawberry jam on top going almost to the edge. ( We used our homemade strawberry jam on this occasion – recipe to follow at a later date ) Now beat your double cream in the mixer until just peaking and spread half of this onto the jam before placing the second sponge on top. Now spread the remaining cream on top of your cake and decorate with fresh strawberries.

Note: For a slight variation you can add a teaspoon of vanilla extract and a teaspoon of caster sugar to the cream before its beaten for a more luxurious flavour.

So next time you have visitors coming go ahead and make this wonderful Ultimate Victoria Sponge . . .

Hasselback Potatoes

Something wonderful about a garlicy, crispy baked potato fresh from the oven !   Hasselback Potatoes are just perfect and so very easy to make.

 Ingredients:

Baking Potatoes – Garlic cloves (1 per potato) – Butter – Sea Salt – Olive Oil – Parmesan Cheese ( Optional )

Method:

Clean the potatoes and slice a slither off the bottom so they sit flat onto the baking tray. Cut into the potato every 3 mm being careful not to cut all the way through the potato. Thinly slice the garlic cloves and add slices of garlic into each of the cuts. Spread a little butter over the top of the potato ensuring that some of the butter goes into the cuts with the garlic. Sprinkle with a generous amount of sea salt before drizzling a small amount of olive oil over the top of the potatoes. If you want a cheesy potato now is the time to sprinkle with the parmesan cheese. Bake the potatoes in an oven for around 45 minutes – 1 hour depending on how crispy you like your potatoes. ( Oven temp 200 c / Gas 6 / 400 f )

Wow, Our Kitchen smells amazing right now, roast lamb and garlic Hasselbacks. Time to pour a large glass of red wine and enjoy. . .